(Almost) modern Debian for a Craig CLP281
ARCHIVED
This document is archived and may be out of date or inaccurate.
Overview
Around 2011 Android devices based on the WonderMedia 8xxx-series SoC (ARM v5) were being sold as netbooks. This article describes how to get Devuan Jessie running from SD card on one such: a Craig CLP281 Netbook
Only available kernel limits the ability to use more recent Linux distributions
As mentioned, the only available kernel (due to proprietary drivers for which no source code was released) is a 2.6 series kernel. That is incompatible with core operating software known as glibc (at least as low as) 2.4. In addition a common software component known as ‘systemd’ requires features not in the 2.6 series kernel. Because of that the newest Debian that can run on these devices is Debian 7 (Wheezy), unless one creates and applies an extensive set of patches.
Only available Debian for this device has been EOL for years
Wheezy was the stable release three generations ago. (New Debian fails to boot, due to depending on systemd, and systemd depending on features not available in the 2.6 kernel).
Wheezy was EOL (End of Life) in April 2016, but had LTS (Long Term Service) updates until about May 2018. It has ELTS (Extra Long Term Service) until December 2019. This means means for some years only some packages have been getting updates, and soon there will be no updates at all. On the other hand the version of Android on this device is far older.
Newest possible Linux version is still old
We can get to a slightly newer version of Linux that is based on Debian by using a distribution that uses much of Debian, but has diverged from Debian over concerns with the ‘systemd’ requirement. That distribution is known as Devuan (Dev 1).
Using Devuan one can get us additional distribution ‘generation’ closer to current. That version of Linux is known as Devuan ‘Jessie’ and is based on Debian Jessie (released ca. 2018).
Dead end
This article is the last in the series for the Craig CLP281 as it is clearly a dead end, and I would not trust a kernel getting no security updates, while using a ‘userspace’ that is also getting no security (or any other) updates, for the purposes of anything ‘real’.
No only that that, but the Craig CLP281 was not exactly the most powerful and useful hardware even when originally sold in 2011. If the makers of this device had made the source code available, and the support for the hardware in the device worked with newer kernels, then there would be at least some value in continuing to tinker with the device (in that case it would be a useful platform for trying out techniques for doing ‘modern’ things with very little computing power, as well as ‘de-bloating’ and improving things like very lightweight graphical desktops).
Hardware
Assembled (normal usage)


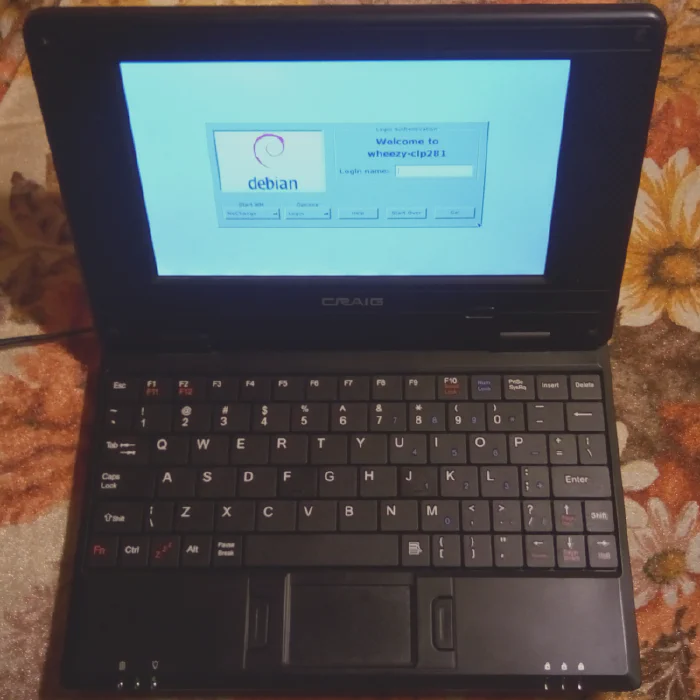
The left, right, back, and front of the Craig CLP281
Inventory
- WonderMedia 8650 SoC
- ARM 926T (v5) Processor
- I2C, SPI, and SF interfaces
- VT85xx-series Graphics
- Raster Operations Acceleration
- JPEG, MPEG2, MPEG4, H264 decode acceleration
- JPEG encode acceleration
- LCD Backlight
- Power Management
- ALSA Audio Codec (Via VT1609)
- ARM 926T (v5) Processor
- SF flash (8MB x 2)
- Hynix HY27UBG8T2ATR NAND flash (2GB x 2)
- 256 MB RAM
- SD Card Reader
- USB Keyboard (built-in)
- USB Touchpad (built-in)
- Speakers (2)
- 800x480 pixel LCD display
- USB 2.0 ports (x3)
- Headphone and microphone jacks
- MMA7660 Accelerometer (note that this is unsupported under Debian)
- Note that built-in audio doesn’t work under Debian due to broken drivers (the GPL kernel tarballs don’t provide working drivers).
Requirements for Booting Debian/Devuan
Booting from SD Card is the Easiest Option
Advanced users could modify the u-boot environment to boot an embedded operating system running directly from the 4GB NAND flash, but that is beyond what most users want to get into. Therefore we first describe booting from SD card which is less risky.
Booting from SD Card
The WonderMedia devices are generally configured to boot from an SD card if one is present. Different generations of devices look for a U-Boot script in different places. In the case of the Craig CLP281, if:
- An SD card is present on boot
- The first partition of the SD card is formatted as FAT16
- A U-Boot script named wmt_scriptcmd is present in the root of the first partition.
then that script will be executed on boot. This allows us to take over the boot process and boot Debian instead of Android. We can do this without modifying the firmware (the Android OS on the flash memory built into the device).
Partition an SD Card with a FAT16 Boot Partition
The first partition on the SD card needs to be a FAT16 partition. It doesn’t have to be very big — a 30MB partition is more than sufficient. The partition only needs to hold the U-boot script and a suitable linux kernel. Also note the partition table type needs to be MS-DOS not GPT.
Other Partitions
The SD Card should also have a partition for the root filesystem and a partition for swap. For this guide we will assume swap on on partition 2 and the rootfs on partition 3.
An Example U-Boot Script for SD Card Booting
display init force
mmcinit 0
fatload mmc 0 0x0 uzImage.bin
setenv bootargs mem=${memtotal} root=/dev/mmcblk0p3 noinitrd rw rootfstype=ext4 console=tty1 console=ttyS0,115200n8 lpj=${lpj} ${platform\_bootargs} init=/sbin/init quiet rootdelay=3
bootm 0x0
Assuming you are on a Debian system, and have u-boot-tools installed and this script is named wmt_scriptcmd.src then execute:
mkimage -A arm -O linux -T script -C none -n "Boot Debian" -a 0 -e 0 -d wmt\_scriptcmd.src wmt\_scriptcmd
Finally, copy wmt_scriptcmd to the root of the FAT16 partition on your SD card.
Build or Obtain a Suitable Kernel
WARNING: Due to https://bugs.launchpad.net/qemu/+bug/1805913 these kernels may be subtly broken due to being built on non-ARM host under Debian Buster. Testing of updated kernels is underway.
For those who want to do a quick test I give you a prebuilt WonderMedia 8650 2.6 kernel and module tarball for the Craig CLP281 that ought to be Wheezy-ready or a prebuilt WonderMedia 8650 2.6 kernel and module debian package for the Craig CLP281 Really, you shouldn’t rely on a random kernel from a random stranger for your final system (and it is experimental and comes with no warranties of any kind either express or implied; if it eats your kittens, your children, or your data, it’s not my fault). Therefore I provide the following instructions on how to build the kernel yourself.
Obtain the Craig CLP281 Kernel Source Code and Build System
On a system capable of building linux 2.6 armel kernels see the cross building article on this site for information on how to set one up.
git clone -b wmcshore-1.0 --depth 1 --recurse-submodules <repo_no_longer_exists> --shallow-submodules wm8650-linux-2.6
Build the Kernel
- You can use make menuconfig and make backports-menuconfig to modify the kernel and backports modules (basically wireless).
- Build the kernel, modules, and create a debian package as well as a tarball containing the kernel and modules.
make J=X all(make will automatically do as much parallelism as possible). On a fast machine this could be done in 3-4 minutes.- You should have a linux-image-*.deb package, as well as linux-2.6.*.tar.bz2.
Build a Devuan Jessie Rootfs
To create your own rootfs, use the script below. Of course you should read the script and verify it won’t destroy the planet, your computer or your data, before executing it.
WARNING: Due to https://bugs.launchpad.net/qemu/+bug/1805913 images built on non-ARM hosts are broken on at least Debian Buster and at least one version of Ubuntu (other distros may also be broken for some versions). As a consequence this article assumes one is using an ARM HF Virtual Machine or a physical ARM system (such as a Raspberry Pi).
What the Script Does
Prerequisite
- Obtain Devuan version of debootstrap.
- git clone https://git.devuan.org/devuan/debootstrap.git
- Make sure the system can find it:
- export DEBOOTSTRAP_DIR=$(pwd)/debootstrap
Create the Base System
mkdir -p clp281-root/root- Copy the debian kernel package into clp281/root
sudo debootstrap --arch=armel --foreign jessie "$(pwd)"/clp281-root http://archive.devuan.org/merged/ jessieexport LANG=C.UTF-8- Depending on what terminal you are using, you may need to also do:
export TERM=xterm-color. (This is only required if your terminal is not supported by a default Devuan Jessie install). - Enter the new root as a chroot
sudo chroot clp281-root /bin/bash
unset DEBOOTSTRAP_DIRexport DEBOOTSTRAP_DIR/debootstrap/debootstrap --second-stage
Prepare the Base System for First Boot
Assuming you are still in the chroot:
mount -t proc proc /procapt-get install makedevcd /devMAKEDEV genericCreate
/etc/fstab, for example:# /etc/fstab: static file system information # # file system mount point type options dump pass /dev/mmcblk0p3 / ext2 defaults,relatime 0 1 /dev/mmcblk0p1 /boot vfat defaults,nosuid,nodev,relatime 1 2 /dev/mmcblk0p2 none swap sw 0 0 proc /proc proc defaults, relatime 0 0Create
/etc/network/interfaces, for example:###################################################################### # /etc/network/interfaces -- configuration file for ifup(8), ifdown(8) # See the interfaces(5) manpage for information on what options are # available ###################################################################### # The loopback interface isn't really required any longer, but can be used # if needed # auto lo iface lo inet loopback # To use dhcp # auto eth0 iface eth0 inet dhcp # An example static IP setup: (network, broadcast and gateway are optional) # # auto eth0 # iface eth0 inet static # address 192.168.0.42 # network 192.168.0.0 # netmask 255.255.255.0 # broadcast 192.168.0.255 # gateway 192.168.0.1 # Include files from /etc/network/interfaces.d source-directory /etc/network/interfaces.dInstall package for better handling of dns resolver configuration
apt-get install resolvconf
Set the system hostname
echo dev1jessie-clp281 > /etc/hostname
Add more available packages and make sure we’re up to date:
- Update
/etc/apt/sources.list. For example:
deb <http://archive.devuan.org/merged> jessie main contrib non-free- Update
apt-get update && apt-get upgradeHandle some basic configuration:
apt-get install locales && dpkg-reconfigure localesapt-get install console-setup && dpkg-reconfigure keyboard-configuration
passwd root(repeat until successfully set; it can fail if you don’t type the password identically both times).Add a new user with administrative access (i.e. root)
apt-get install sudoadduser clp281adduser clp281 sudo
Make sure we start with the full set of standard packages for a Debian minimal install (no desktop).
tasksel install standardInstall and configure the kernel:
dpkg -i root/linux-image-*.deb(there should be only one .deb)depmod [your-kernel-version]rm -f root/linux-image-*.deb
Do some clean up:
apt-get clean
Clear mounts and exit
umount /proc
exit
Using a Script
NB: The script is interactive and you will be prompted at some points. If you’re looking for complete automation you will need to modify the script appropriately.
Change out of the kernel build directory and create and enter a new clp281-root directory.
Copy the script below to
create-jd1-armel-clp281.shin that directory.Copy the appropriate linux-image-*.deb to that directory as well, and make sure there is only one linux-image-*.deb there.
sudo bash -c create-jd1-armel-clp281.sh#!/bin/bash DEBOOTSTRAP_DIR="$(pwd)/debootstrap" export DEBOOTSTRAP_DIR mkdir -p clp281-root/root cp linux-image-*.deb clp281-root/root/ debootstrap --arch=armel --foreign jessie "$(pwd)"/clp281-root <http://archive.devuan.org/merged/> jessie cat >clp281-root/root/prepare-debian-rootfs.sh <<EOF #!/bin/bash export LANG=C.UTF-8 export TERM=xterm-color unset DEBOOTSTRAP_DIR export DEBOOTSTRAP_DIR /debootstrap/debootstrap --second-stage mount -t proc proc /proc cd /dev apt-get -y install makedev MAKEDEV generic cat >/etc/fstab <<FSTABEOF # /etc/fstab: static file system information # # file system mount point type options dump pass /dev/mmcblk0p3 / ext2 defaults,relatime 0 1 /dev/mmcblk0p1 /boot vfat defaults,nosuid,nodev,relatime 1 2 /dev/mmcblk0p2 none swap sw 0 0 proc /proc proc defaults, relatime 0 0 FSTABEOF cat >/etc/network/interfaces <<IFACEEOF ###################################################################### # /etc/network/interfaces -- configuration file for ifup(8), ifdown(8) # See the interfaces(5) manpage for information on what options are # available ###################################################################### # The loopback interface is not really required any longer, but can be used # if needed # auto lo iface lo inet loopback # To use dhcp # auto eth0 iface eth0 inet dhcp # An example static IP setup: (network, broadcast and gateway are optional) # # auto eth0 # iface eth0 inet static # address 192.168.0.42 # network 192.168.0.0 # netmask 255.255.255.0 # broadcast 192.168.0.255 # gateway 192.168.0.1 # Include files from /etc/network/interfaces.d source-directory /etc/network/interfaces.d IFACEEOF apt-get -y install resolvconf echo wheezy-clp281 >/etc/hostname cat >/etc/apt/sources.list <<SRCEOF deb <http://archive.devuan.org/merged> jessie main contrib non-free SRCEOF RET=1 while [ "\$RET" != "0" ]; do passwd root; RET="$?" done apt-get update && apt-get -y upgrade apt-get -y install locales && dpkg-reconfigure locales apt-get -y install console-setup && dpkg-reconfigure keyboard-configuration apt-get -y install sudo tasksel install standard dpkg -i /root/linux-image-*.deb # This only works because we are starting with a fresh rootfs kver="\$(cd /lib/modules && ls -A | head -n1)" depmod "\$kver" rm -f /root/linux-image-*.deb apt-get clean umount /proc EOF chmod 755 clp281-root/root/prepare-debian-rootfs.sh PATH=/bin:/sbin:/usr/bin:/usr/sbin /sbin/chroot clp281-root /bin/bash -c /root/prepare-debian-rootfs.sh || { echo "Failed to chroot; can't create rootfs" exit 1 } echo "Done. Created rootfs."
Add Additional Packages
sudo /sbin/chroot clp281-root /bin/bashmount -t proc proc /proc- Use
apt-getand/ortaskselto install more packages (for example, a desktop environment). - Perform any other pre-boot configuration.
exit
Copy the Rootfs to the SD Card
Create an Empty Filesystem on the Rootfs Partition
sudo /sbin/chroot clp281-root /bin/bashmount -t proc proc /proc- If your SD card is mounted on
/dev/mmcblk0and you are using swap on partition 2 and rootfs on partition 3, then:mkswap /dev/mmcblk0p2mkfs.ext4 -L ROOT /dev/mmcblk0p3
umount /procexit
Copy the Rootfs you created to the Rootfs Partition
sudo mount /dev/mmcblk0p3 /mntsudo mount /dev/mmcblk0p1 /mnt/bootsudo rsync -arDltx --info=progress2 clp281-root/ /mnt/ && sync
Final Steps
sudo umount /mnt/bootsudo umount /mnt- Remove SD Card from you computer and place it in the CLP281 SD card slot.
- Boot the CLP281 with Devuan Jessie for the first time.
- If you are using the prebuilt root filesystem then the root password is password. CHANGE THE PASSWORD ASAP.
- Configure Debian with a desktop and desired software, etc.
- Enjoy!
Useful information
- https://kernelhacks.blogspot.com/2012/06/building-wm8650-netbook-kernel.html
- [No longer available]
- https://github.com/rvolkov91/wm8650-gpl-reference-kernel
Original Sources for the Kernel Git Repositories
Older projectgus WonderMedia 8650 GPLTarball — incomplete (no longer available) Local copy of older projectgus WonderMedia 8650 GPL tarball — Incomplete
Newer Android WonderMedia 8650 GPL source or Local copy of newer Android WonderMedia 8650 GPL tarball
Linux Backports 3.18.1-1 tarball or Local copy of Linux Backport 3.18.1-1 tarball
You need to make sure the patches you apply and the base kernel source are using the same line endings by using a tool such as dos2unix or unix2dos as the source files have a mix of line endings.
Neither tarball is the exact kernel source for the binary that shipped with the CLP281 but the newer one is close enough to get the job done. For the tarball based on slightly older Android, not all drivers are working (e.g. sound and battery, at least, are broken).
Patches From Various Sources
In order to run Debian 7 (Wheezy) or later, the following patches to the provided kernel are required (patches use Unix style line endings (LF) unless otherwise noted):
- Patch the kernel so the the kernel build creates modules.builtin. (See https://patchwork.kernel.org/project/linux-kbuild/patch/1253891624-5816-1-git-send-email-mmarek@suse.cz/raw/ or Local copy of make kernel build generate modules.builtin)
- Patch various drivers (bug fixes). (See https://download943.mediafire.com/p33g2o6n2isg/28xor4fr7ws1c11/wm8650_netbook.patch or Local copy of WM8650 GPL Tarball Driver Bug Fixes). Note the local copy uses Unix line endings (LF) but the patch on mediafire uses Windows line endings (CRLF).
- Patch to add sys_accept4() (required for udev). See Local copy of backport: wire up sys_accept4() on ARM, or (but needs adjustment to work with this version of the kernel) ~~[backport: wire up sys_accept4() on ARM] [No longer available from original source].
- Patch to create /sys/fs/cgroup mountpoint. (See https://github.com/kelvinlawson/meta-kirkwood/blob/master/recipes-kernel/linux/files/0001-cgroupfs-create-sys-fs-cgroup-to-mount-cgroupfs-on.patch) or Local copy of cgroupfs: create /sys/fs cgroup to mount cgroupfs on
- There are a number of patches only found in the v2.6.39/standard/wm8650-cshore branch of a since removed repository. Contact the site operator if you need a copy.
- The build system from the GPL reference tarball above has been modified and stored in a since removed repository. Contact the site operator if you need a copy.
- A working configuration for the kernel and backports is located in of a since removed repository. Contact the site operator if you need a copy.
P.S. No kittens were harmed in the making of this post.