This article details using the XCA GUI for creating private SSL certificates for enabling end-to-end SSL on non-public servers.
Preface
This article details using the XCA (available for at least Linux, Windows, and
MacOS for creating and managing SSL certificates) software package (it is a
GUI) for creating private SSL certificates for enabling end-to-end SSL on
non-public servers (e.g. where Let’s Encrypt / Certbot don’t make sense or are
not an option).
The usual way for your OS (e.g. on Windows, from the ‘Start’ Menu, on GNOME
on Linux, click on the XCA icon in you ‘Applications’ screen, etc).
This will open a window prompting for a database. If this is is to be a new
certificate store (e.g. the first time using XCA or you want a separate store
for new certificates) you should create one, otherwise select an existing
database and enter the password for it.
Create a self-signed CA (Certificate Authority)
NB Any application that will be using SSL to access a server using a
certificate signed by this private CA will need to be told to trust the private
CA. This varies with application, so where I use this in other articles, I
provide instructions for the particular application in use.
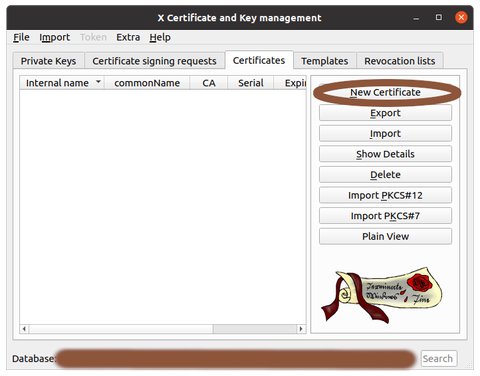
Click on 'New Certificate' or press 'Alt-N'
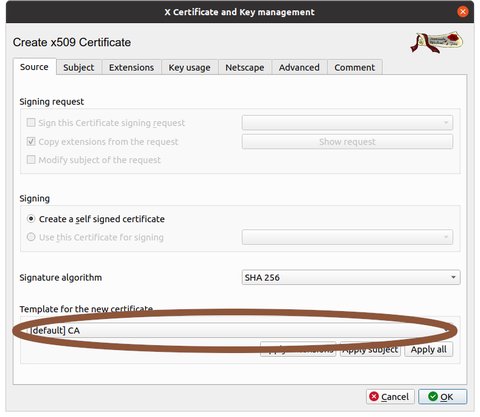
Near the bottom of the dialogue, under 'Template for new certificate', select '[default] CA'
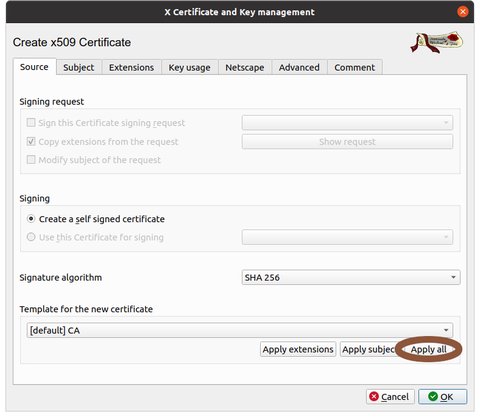
Click on 'Apply all'
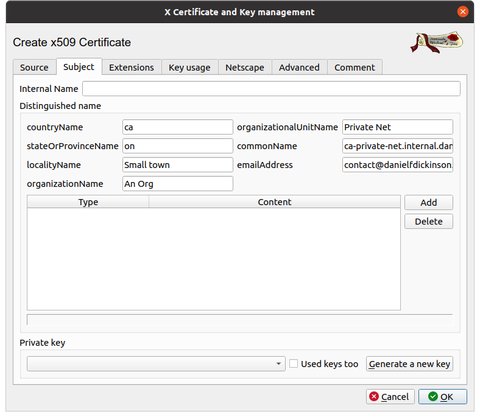
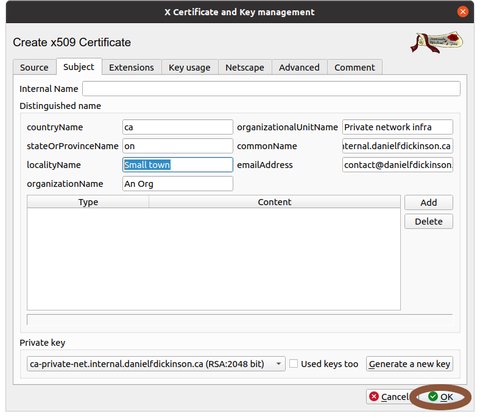
Select the Subject tab and fill in the information as appropriate
Click on Generate a new key'
Click 'OK' or press 'Alt-O'
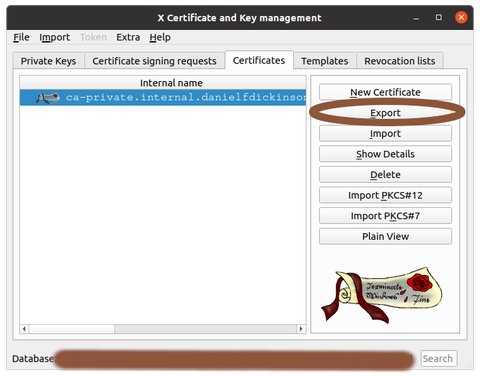
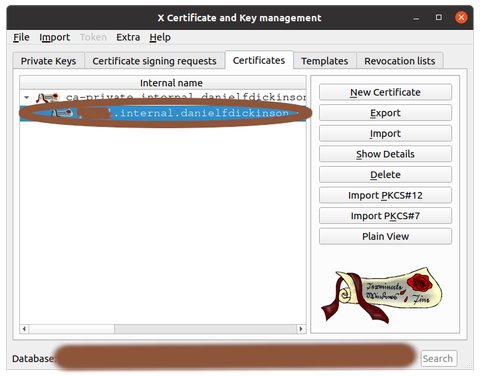
Export the CA’s public key (.crt)
Select the CA
Click 'Export' button
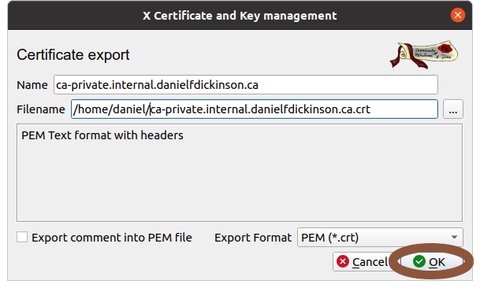
Choose where to export CA (choose it's filename and location) (later we'll assume you called the file 'ca-private-net.crt' and you know where to find it)
Click the 'OK' button
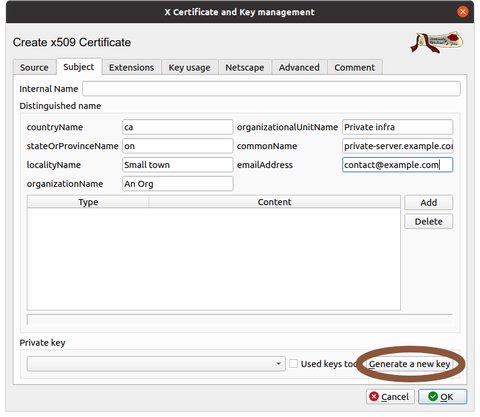
Create a server certificate and private key
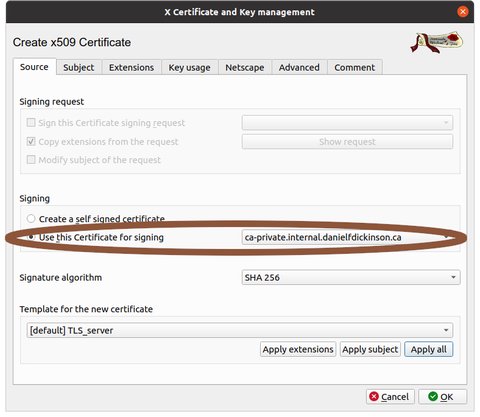
Select the CA
Click on 'New Certificate' or press 'Alt-N'
Make sure 'Use this Certificate for signing' is set to your CA
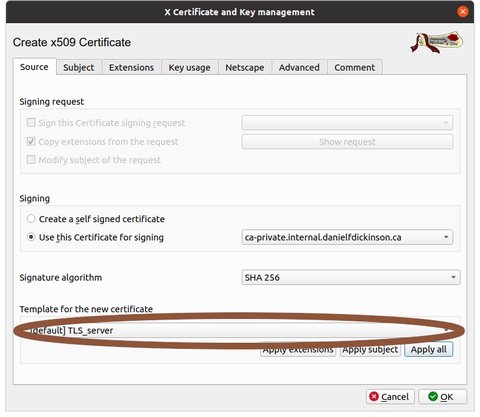
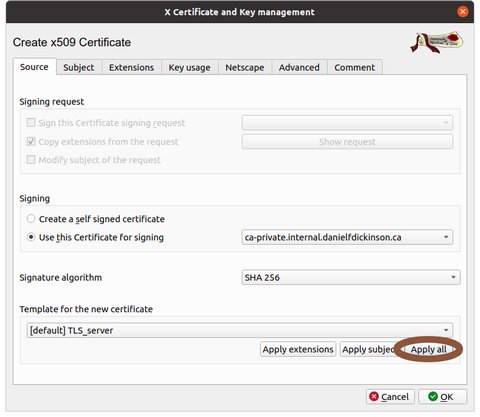
In the 'Template for new certificate' drop down, select '[default] TLS_server'
Click 'Apply all' button
Select the Subject tab and fill in the information as appropriate. Note that the CN (common name) should be the primary DNS name of your server.
Click on Generate a new key'
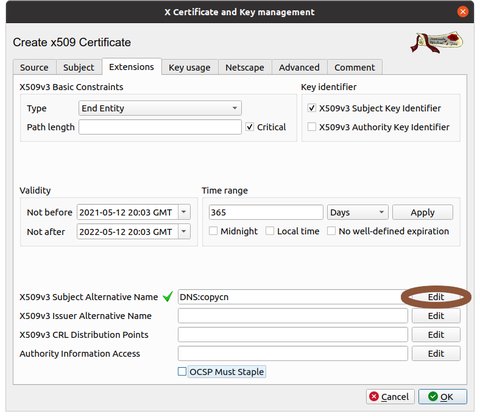
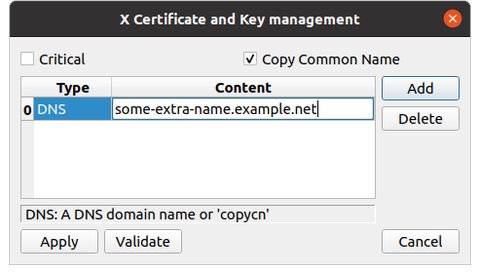
Select the Extensions tab, and select 'Edit' beside X509v3 Subject Alternative Name
Select add and add a DNS name or IP besides the CN (common name). If there are no alternative names or IP addresses to be used, this can be left with only 'Copy Common Name' checked and no additional entries.
Repeat ‘Add’ in this dialogue for every name (DNS) or IP by which the
server will be accessed using SSL. If there none besides the CN (Common Name) ,
then none need to be added.
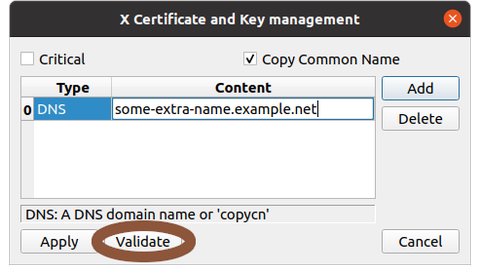
Select 'Validate'. If there are issues, fix them.
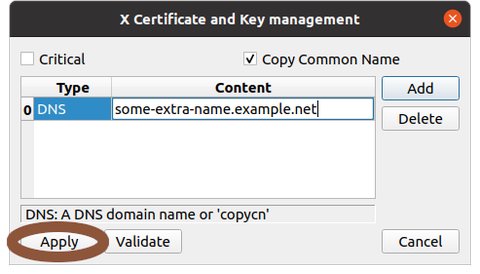
Click 'Apply'
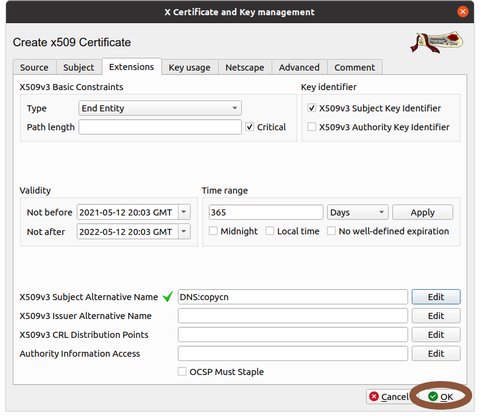
Select 'OK'
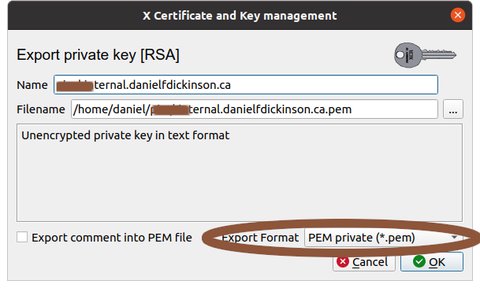
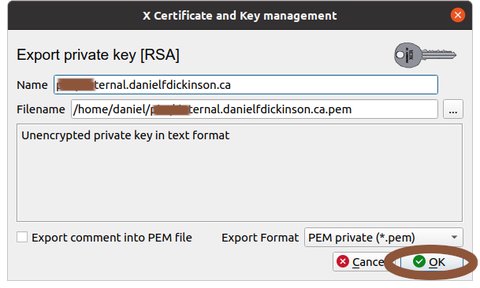
Export the server certificate and private key
Export the server certificate
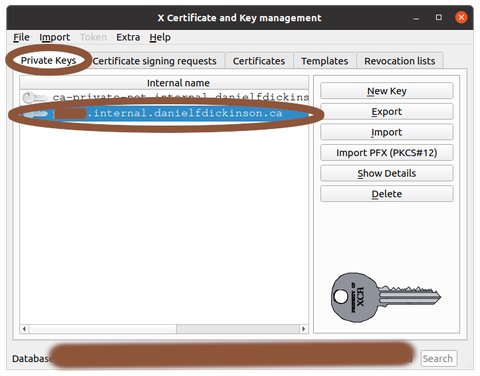
Select the new certificate (you will have to double-click on your CA first)
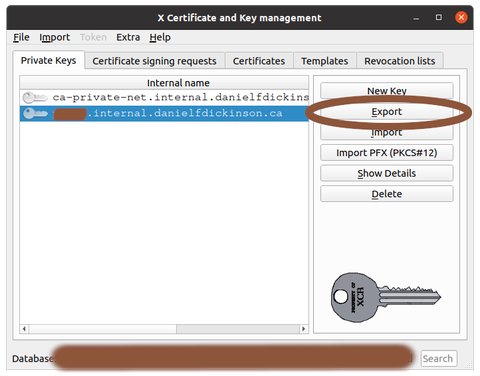
Select 'Private Keys' tab and select the private key associated with the certificate above
Click on 'Export' button
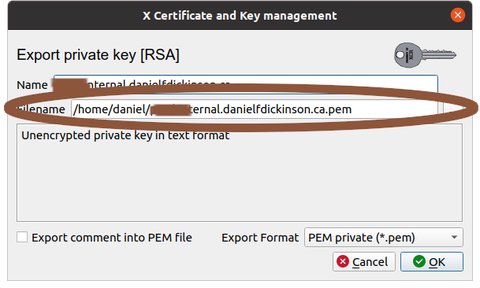
Choose where to export (filename) (later we'll assume 'private-server.example.com.pem')
Select 'PEM private' (NB protect this file as it contains important security information; preferably securely erase any copies once it is in the needed location on the server)
Click 'OK' button
Copy the exported files to your server and/or clients
You will need to copy the at least the server private key and certificate to
you server (details are application dependent so for articles on this site will
be covered in the article for the application).
Clients will need the CA certificate and possibly need to per-app
configuration to use it. As with the server certificate and key, for articles
on this site the details will be covered in the article for the application).
Prepare your user clients to use SSL to the server
NB This is for certificates for web servers, git server, etc where a
desktop user will need to access the server via SSL.
Because we are using a private CA your browser and other desktop clients need
to be told to trust the private CA.
On any Debian/Ubuntu workstation that needs to access the private CA, copy
the private CA certificate (e.g. ca-private.example.com) to
/usr/local/share/ca-certificates and execute update-ca-certificates
Also on any Debian/Ubuntu workstation for which Firefox needs to access the
server:
Note: Even when the main Firefox is an ESR release and uses
/etc/firefox-esr,
for adding policies (like installing certificates) it is necessary to use
/etc/firefox/policies/policies.json.
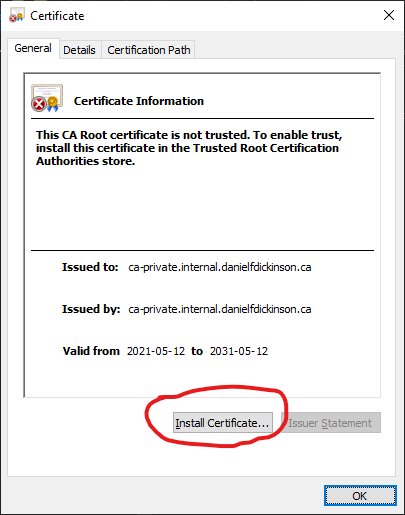
On any Windows workstation that needs to access the private CA,
Install the private CA into the system certificate store
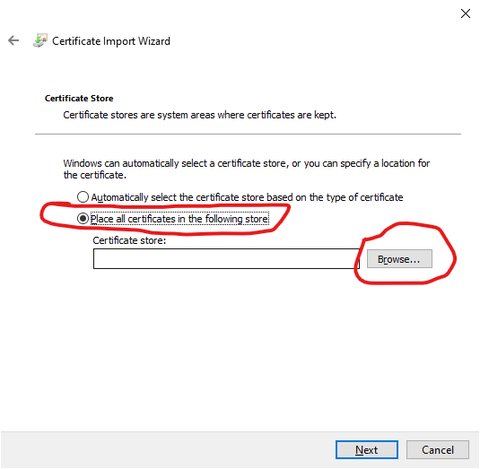
Open install certificate dialogue
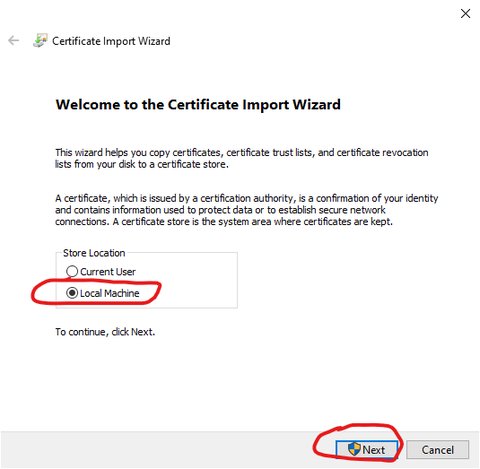
Select 'Local Machine' in install certificate wizard, then 'Next'
Select location to install certificate
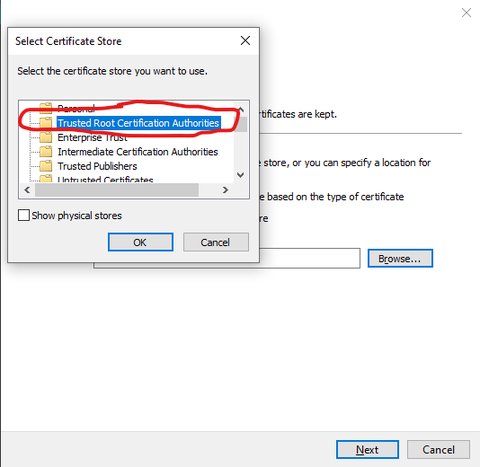
Select which system-wide store to use
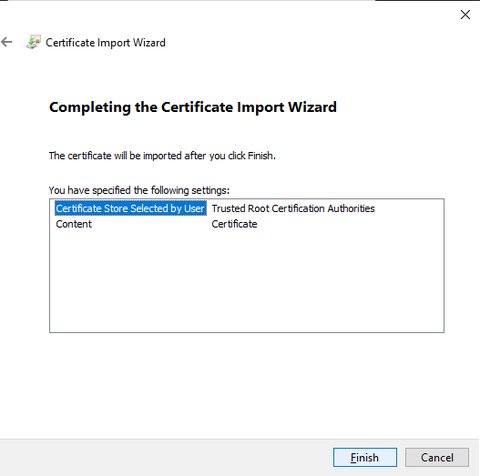
View confirmation of certificate addition and click 'Finish'
For making the CA available for recent Firefox system-wide:
Create a directory called C:\\ProgramData\\FirefoxCertificates
Copy ca-private.example.com.crt to
C:\\ProgramData\\FirefoxCertificates
Create a directory called distribution in
C:\\Program Files\\Mozilla Firefox, and in the distribution directory
add a file called policies.json containing: